When the power goes out, especially in the dead of night or during a storm, the last thing you want is to trudge through the elements just to fire up your generator. That's precisely where the magic of a remote start system comes in, transforming a manual chore into a simple button press from the comfort and safety of indoors. This guide walks you through the essential Installation & Setup for Remote Start Generators, turning a seemingly complex task into an achievable DIY project for the prepared homeowner.
Imagine having a warm, lit home in minutes, without ever stepping outside. Installing remote start on your generator isn't just about convenience; it's about adding a layer of safety, efficiency, and peace of mind to your emergency preparedness.
At a Glance: Your Quick Guide to Remote Start Setup
- Why Remote Start? Enjoy convenience, enhanced safety, and quicker response during power outages.
- Preparation is Key: Select a compatible kit, gather essential tools, and prioritize safety protocols.
- Know Your Generator: Understand its control panel, battery, and critical wiring points using your manual.
- Step-by-Step Wiring: Carefully connect power cables to the battery and control signals to the generator's board.
- Module Configuration: Pair your remote with the module and test its operational range.
- Thorough Testing: After installation, verify all connections, perform a manual start, then test the remote functionality.
- Routine Maintenance: Periodically check connections, test the system, and keep it clean to ensure reliability.
Why Bother with Remote Start? The Unseen Advantages
Before we dive into the nuts and bolts, let's talk about the "why." While the primary benefit of a generator is obvious – power when you need it most – adding a remote start elevates its utility significantly. Think about those unexpected power interruptions: a sudden thunderstorm, a winter blizzard, or even just a neighborhood grid issue. Instead of venturing into potentially hazardous conditions to manually crank your generator, a remote start allows you to activate it from a safe distance, often from inside your home.
This isn't just about avoiding a soggy walk. It's about immediate comfort, especially crucial if you have young children, elderly family members, or medical equipment requiring constant power. The ability to quickly and safely restore power can turn a stressful situation into a manageable inconvenience. For those interested in maximizing their generator's potential, it's worth taking time to learn about remote start generators and their full capabilities.
Before You Begin: The Essential Preparations
Successful installation hinges on meticulous preparation. Rushing through this phase is the surest way to encounter headaches down the line.
Choosing the Right Remote Start Kit: Compatibility is Key
The market offers a variety of remote start kits, from simple key-fob systems to advanced app-controlled modules. Your first and most critical step is to select a kit that is explicitly compatible with your generator's make, model, and engine type. Not all generators are created equal, and their control systems vary significantly.
- Check Your Generator Manual: This is your bible. It will often indicate if your model is "remote start ready" or list compatible kits. Look for wiring diagrams that show access points for start/stop signals.
- Consider Features: Do you need basic start/stop, or would you prefer features like monitoring fuel levels, battery status, or fault codes remotely? Some advanced kits integrate with smart home systems, offering greater control and data.
- Brand Reputation: Stick with reputable brands that offer good customer support and clear installation instructions. A well-known brand can save you a lot of troubleshooting time.
- Power Requirements: Ensure the kit's power draw is compatible with your generator's battery and charging system.
Gathering Your Toolkit: What You'll Need
Having the right tools at hand not only makes the job easier but also safer. Beyond the basics, here's what you'll likely require:
- Screwdrivers (Phillips and Flathead): For opening generator panels and securing terminals.
- Wire Strippers/Cutters: Essential for preparing wires for connections.
- Electrical Tape or Heat Shrink Tubing: For insulating connections.
- Multimeter/Voltage Tester: Absolutely critical for verifying power and signal continuity, ensuring you don't accidentally short anything.
- Wire Crimpers and Connectors: To make secure, professional-grade electrical connections (e.g., spade, ring terminals).
- Cable Ties or Wire Loom: For neatly securing new wiring and preventing chafing.
- Work Gloves and Safety Glasses: Non-negotiable for personal protection.
- Flashlight or Headlamp: Even in daylight, confined spaces can be dark.
- Generator Manual and Remote Start Kit Manual: Keep both open and accessible.
Safety First: Non-Negotiables for Electrical Work
Working with generators involves electricity and fuel, both of which demand respect. Prioritizing safety is paramount.
- Disconnect Power: ALWAYS disconnect the generator's battery before starting any wiring. Remove the negative terminal first, then the positive.
- Fuel Shut-Off: If possible, turn off the fuel supply to prevent accidental starts.
- Ventilation: If working indoors (e.g., in a garage with the generator pulled in for service), ensure adequate ventilation to prevent carbon monoxide buildup. However, a generator should never be run indoors.
- Personal Protective Equipment (PPE): Wear safety glasses to protect your eyes from sparks or flying debris, and work gloves to protect your hands. You'll find more insights into safe operation in any guide on essential portable generator safety tips.
- Have a Fire Extinguisher Nearby: Just in case.
Mapping Your Generator: Knowing Its Insides
Understanding where your generator's critical components are located is fundamental. This is where your generator's owner's manual becomes your most valuable asset.
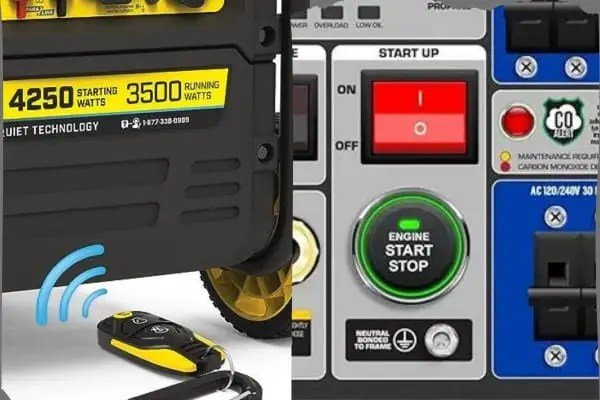
- Generator Control Panel: This is the central hub, usually on the front or side, housing switches, buttons, and displays. Your remote start module will need to interface with this. Identify the start/stop buttons or terminals.
- Battery: Your generator's battery supplies power to the remote start system. Locate it, often near the engine or in a dedicated compartment. Clearly identify the positive (+) and negative (-) terminals.
- Wiring Points: These are the terminals and connectors that link the control panel to the battery and engine. The manual will show precise locations for start, stop, and status signals. Take your time to mark these clearly, perhaps with small labels, before you begin any wiring.
The Heart of the Matter: Step-by-Step Installation
With preparations complete, it's time to get hands-on. Follow these steps carefully, referring to both your generator's manual and your remote start kit's instructions.
1. Pre-Wiring Checks: Power Down & Confirm
Before touching any wires, perform a final safety check:
- Generator Off: Ensure the generator is completely off and cooled down.
- Battery Disconnected: Confirm the negative terminal, then the positive, are disconnected from the generator's battery.
- Fuel Off: If applicable, verify the fuel supply is shut off.
2. Connecting the Power: Bringing Life to the System
Your remote start module needs power to operate. This typically comes directly from the generator's battery.
- Choose the Right Gauge Wire: The remote start kit will specify the correct wire gauge. Using too thin a wire can lead to overheating or insufficient power.
- Connect to Battery Terminals:
- Carefully connect the positive (+) power cable from the remote start module to the generator's positive battery terminal. Use a ring terminal for a secure connection.
- Connect the negative (-) (ground) power cable from the module to the generator's negative battery terminal or a suitable chassis ground point.
- Secure Connections: Ensure all connections are tight and corrosion-free. Use electrical tape or heat shrink tubing to insulate exposed wire.
3. Integrating Control Signals: The Brains of the Operation
This is the most critical part, as it tells your generator when to start and stop. This typically involves connecting specific wires from the remote start module to the generator's control board.
- Identify Start/Stop Signals: Consult your generator's manual to locate the specific pins or wires on the control board that trigger the start and stop functions. Some generators might have dedicated remote start terminals; others may require tapping into existing button wiring.
- Connect Signal Wires:
- Connect the "start" signal wire from your remote start module to the corresponding start pin/wire on your generator's control board.
- Connect the "stop" signal wire from your remote start module to the corresponding stop pin/wire.
- If your kit includes "status" wires (e.g., indicating running, fault, low fuel), connect these to the appropriate points on the generator's control board as per both manuals.
- Verify Polarity and Pinout: Double-check that you're connecting to the correct pins and observing any polarity requirements (positive/negative) outlined in the manuals. A wrong connection here could damage your generator's control board or the remote start module.
4. Mounting the Module: Securing Your System
Once all wiring is in place, you'll need to securely mount the remote start module.
- Location: Choose a location that is:
- Protected: Away from direct weather, excessive heat, and vibration.
- Accessible: For future maintenance or adjustments.
- Close Enough: To the generator's control panel for signal wire routing.
- Secure Fastening: Use screws or strong adhesive (if suitable for outdoor use) to mount the module firmly.
- Neat Wiring: Use cable ties or wire loom to bundle and secure all new wiring, keeping it away from moving parts, hot exhaust, or sharp edges.
5. Configuring Your Remote: Making the Connection
With the module installed and powered, the final step before testing is to pair your remote.
- Follow Kit Instructions: Each remote start kit will have a specific pairing procedure. This often involves pressing a button on the module, then a sequence of buttons on the remote.
- Set Frequency (if applicable): Some older or more basic kits might require setting a frequency or dip switches to match the remote to the module.
- Test Range: Once paired, test the remote's communication range from different distances and through potential obstructions (like walls) to ensure it works reliably from your desired location.
The Moment of Truth: Testing Your Remote Start System
After all that careful work, it's time to see your efforts pay off. Testing must be systematic and thorough.
1. Double-Checking Everything: A Final Visual Inspection
Before reconnecting power, take one last sweep:
- All Connections Secure? Tug gently on each wire connection to ensure it's tight.
- Insulation Intact? Confirm all exposed wire is properly insulated with tape or heat shrink.
- Wires Clear? Are all wires routed away from moving parts, hot surfaces, and pinch points?
- Tools Removed? Ensure no tools are left inside the generator housing.
2. First Start-Up: What to Watch For
- Reconnect Battery: Connect the positive (+) terminal first, then the negative (-) terminal.
- Manual Start: Attempt to start the generator manually using its onboard controls.
- Listen and Observe: Does it start smoothly? Are there any unusual sounds, vibrations, or smoke?
- Check Control Panel: Look for any error messages or unusual indicator lights. The generator should operate normally.
- Generator Output: If your generator provides power to your home (e.g., via a transfer switch), ensure it's supplying power as expected. For reliable emergency power, knowing about reliable emergency power solution is crucial.
3. Remote Activation Test: The Ultimate Proof
Now, for the main event.
- Distance Test: Move to your desired remote operating location (e.g., inside your home).
- Activate Remote Start: Press the start button on your remote.
- Generator Response: The generator should crank and start smoothly, just as it did manually.
- Listen and Observe: Again, listen for any strange noises and ensure stable operation.
- Activate Remote Stop: Press the stop button on your remote. The generator should shut down cleanly.
- Repeat: Perform a few start/stop cycles to confirm consistent operation. Test from various distances within the specified range.
Troubleshooting Common Hiccups: When Things Don't Go as Planned
- Generator Doesn't Start Remotely:
- Check battery connections on both the generator and the module.
- Verify signal wire connections to the generator's control board.
- Ensure the remote is paired correctly and has fresh batteries.
- Check the generator's fuel level and oil.
- Limited Remote Range:
- Relocate the remote start module to a spot with fewer obstructions or higher up.
- Check for interference from other wireless devices.
- Ensure the remote's batteries are good.
- Generator Starts, Then Stops:
- This could indicate a fault detected by the generator itself (e.g., low oil, overheating). Check the generator's fault indicators.
- Verify the "stop" signal wire isn't accidentally active.
Keeping It Running Smoothly: Ongoing Maintenance
Installation is just the first step. To ensure your remote start system remains reliable, periodic maintenance is essential.
- Routine Cable Inspection: At least quarterly, visually inspect all wiring and connections for looseness, corrosion, or damage. Tighten any loose terminals.
- Cleanliness: Keep the remote start module and its connections free of dirt, dust, and debris. A build-up can lead to poor conductivity or overheating.
- Test Periodically: Every few months, or before a predicted storm season, perform a full remote start and stop test. This ensures the system is ready when you truly need it.
- Battery Check: Ensure the generator's main battery is fully charged and in good health, as it powers the remote start system. Also, replace the batteries in your remote fob annually.
- Consult Your Manuals: Adhere to the maintenance schedules provided in both your generator's and remote start kit's manuals. A general overview of generator care can be found in a thorough generator maintenance checklist.
Beyond the Basics: Frequently Asked Questions About Remote Start Installation
You've got questions; we've got answers.
How long does a typical installation take?
For someone with moderate DIY experience and a clear set of instructions, installation typically takes 1 to 3 hours. Factors like the complexity of the kit, the accessibility of your generator's components, and your prior experience with electrical wiring can influence this timeframe. Beginners should budget more time and err on the side of caution.
How does a remote start generator system actually work?
At its core, a remote start system uses a wireless transmitter (your remote fob or a smartphone app) to send a signal to a receiver module installed on your generator. This module then translates that wireless signal into an electrical command, mimicking the action of manually pressing the start button on your generator's control panel. This command activates the generator's starter motor, fuel system, and ignition, bringing it to life.
Can any generator be retrofitted with remote start?
Most large, modern generators can be retrofitted with a remote start kit, but not all. It largely depends on the generator's control system. Generators with electronic ignitions and accessible start/stop signal terminals are generally good candidates. Older, very basic, or extremely small portable generators might lack the necessary electronic interface. Always, always check your generator's manufacturer manual for compatibility or consult with the manufacturer directly.
What's the difference between remote start and an automatic transfer switch (ATS)?
- Remote Start: This system allows you to manually initiate the generator's startup (and shutdown) from a distance using a remote control. It's about convenience for starting.
- Automatic Transfer Switch (ATS): An ATS is a more sophisticated system that monitors your home's utility power. When it detects an outage, it automatically starts your generator, waits for it to come up to speed, and then seamlessly transfers your home's electrical load from utility power to generator power. When utility power returns, it reverses the process. An ATS handles both starting and load transfer automatically, requiring no human intervention. Remote start is a feature; ATS is a full power management system.
When should I consider professional installation?
While many handy homeowners can tackle remote start installation, there are times when calling a professional is the smarter choice:
- Lack of Electrical Experience: If you're uncomfortable working with electrical wiring, a professional electrician or generator technician can ensure a safe and correct installation.
- Complex Generator Systems: Some generators have highly integrated or proprietary control systems that are difficult for a novice to interface with.
- Warranty Concerns: Modifying your generator could potentially void its warranty. A professional installer familiar with your generator might be able to advise on methods that maintain warranty coverage.
- Time Constraints: If you're short on time or simply prefer to have it done by an expert, professional installation is a valuable option.
- Integrating with ATS: If you're looking to integrate remote start with an automatic transfer switch or other whole-home systems, professional expertise is highly recommended, especially when considering choosing the right size generator for your home and its full system integration.
Final Thoughts: Empowering Your Generator for Modern Living
Installing a remote start system on your generator is a significant upgrade that enhances convenience, safety, and your overall readiness for power interruptions. By carefully following the preparation, installation, and testing steps outlined in this guide – and always prioritizing safety – you can confidently equip your generator with this modern amenity.
Remember, your generator is an investment in your home's resilience. Giving it the ability to be started at the touch of a button means you're not just buying power; you're buying peace of mind, knowing that a comfortable, well-lit home is always within easy reach, no matter what the weather outside holds.